Appearance
containerd教程 - 7 Network管理
在前面创建和运行容器的时候,容器是没有网络的,容器内部只有一个本地回环网络lo,所以容器没有办法通过网络和外部进行交互。
所以我们需要为 containerd 安装网络插件 CNI(Container Network Interface),让容器可以和外部进行通信。
7.1 在主机上创建CNI网络
下面的操作是在 containerd 所在的主机上创建一个网络接口,作为容器通信的网桥,后面配置容器使用这个网桥进行通信。
1 获取CNI
首先需要获取CNI,用来生成网络。
在 github 上搜索 cni,找到 containernetworking/cni :

找到发布的版本:
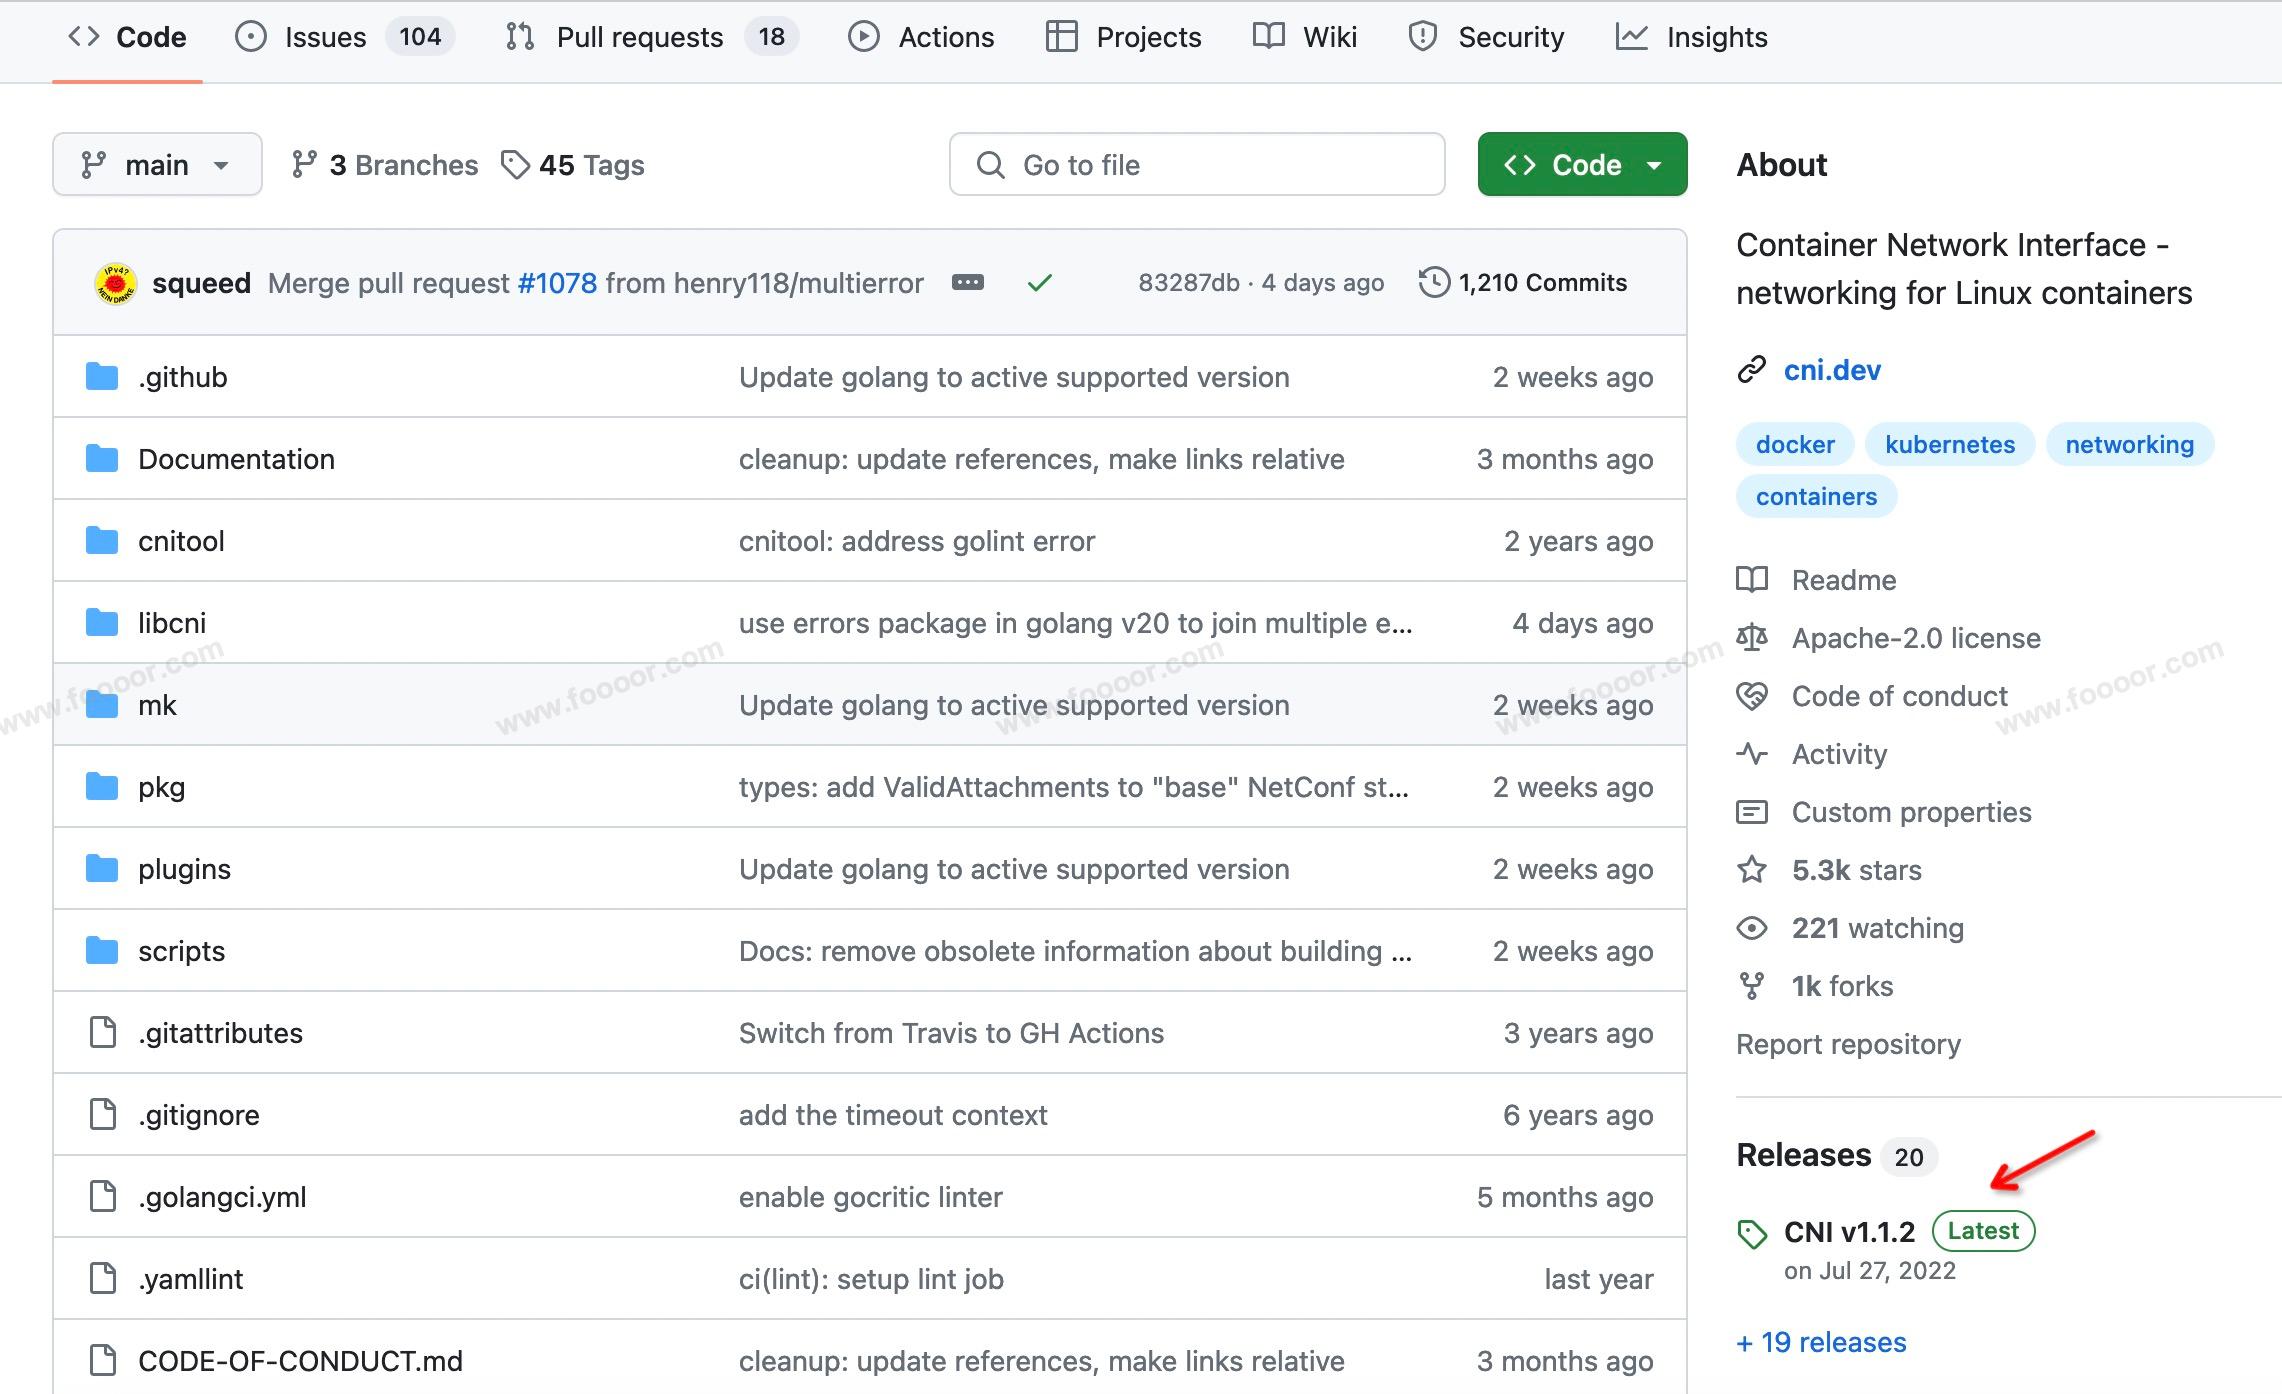
找到压缩包,Linux系统一般下载 tar.gz 包就行:

右键复制压缩包地址,通过 wget 命令在主机上下载即可:
shell
# 下载压缩包
wget https://github.com/containernetworking/cni/archive/refs/tags/v1.1.2.tar.gz

# 解压cni压缩包,里面包含了cni的工具脚本
tar -zxvf v1.1.2.tar.gz

# 解压完的目录是cni-1.1.2,重命名一下解压的目录,为了方便操作
mv cni-1.1.2 cni

# 查看一下cni目录下的内容,后面会用到scripts目录下的脚本
doubi@doubibiji-server:~$ ls cni
cnitool             CONVENTIONS.md  go.mod         libcni    MAINTAINERS  README.md     scripts
CODE-OF-CONDUCT.md  DCO             go.sum         LICENSE   pkg          RELEASING.md  SPEC.md
CONTRIBUTING.md     Documentation   GOVERNANCE.md  logo.png  plugins      ROADMAP.md    test.sh
2 获取CNI插件
CNI插件的主要作用是可以帮我们把网络配置到容器中。
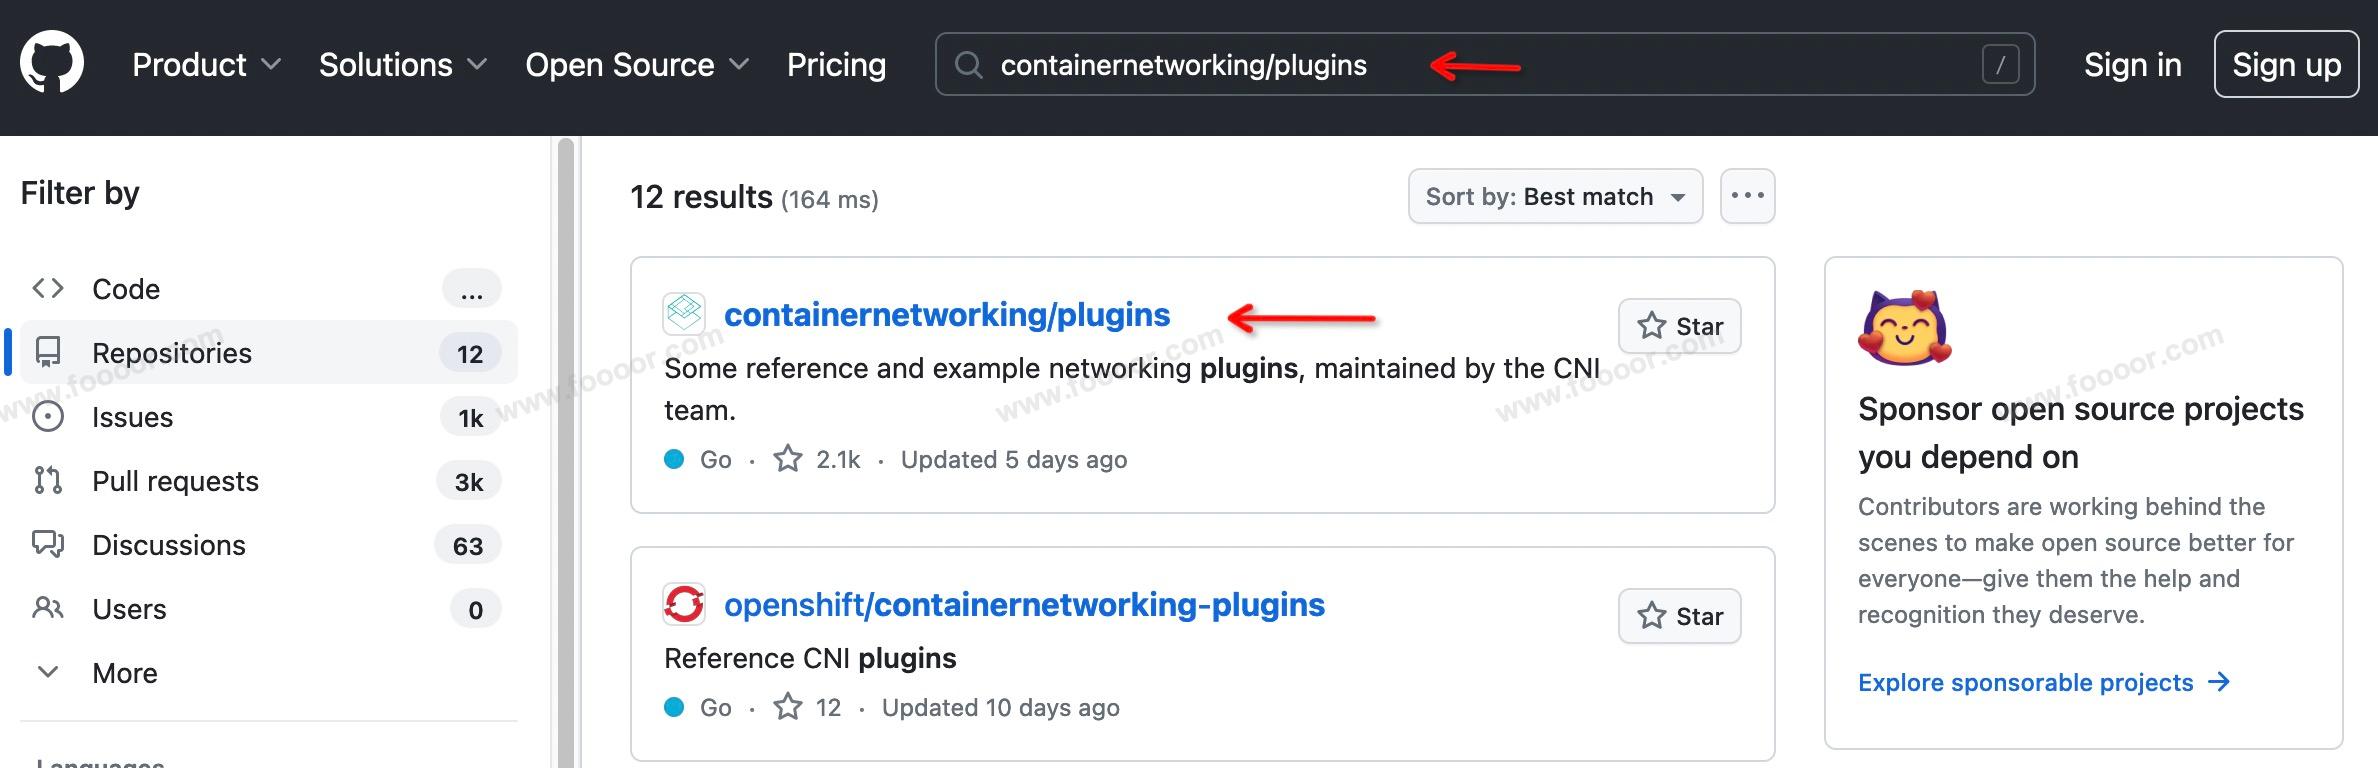
在 github 上搜索 cni,找到 containernetworking/plugins :
找到发布的版本:

根据自己主机的架构,选择版本,右键获取链接:
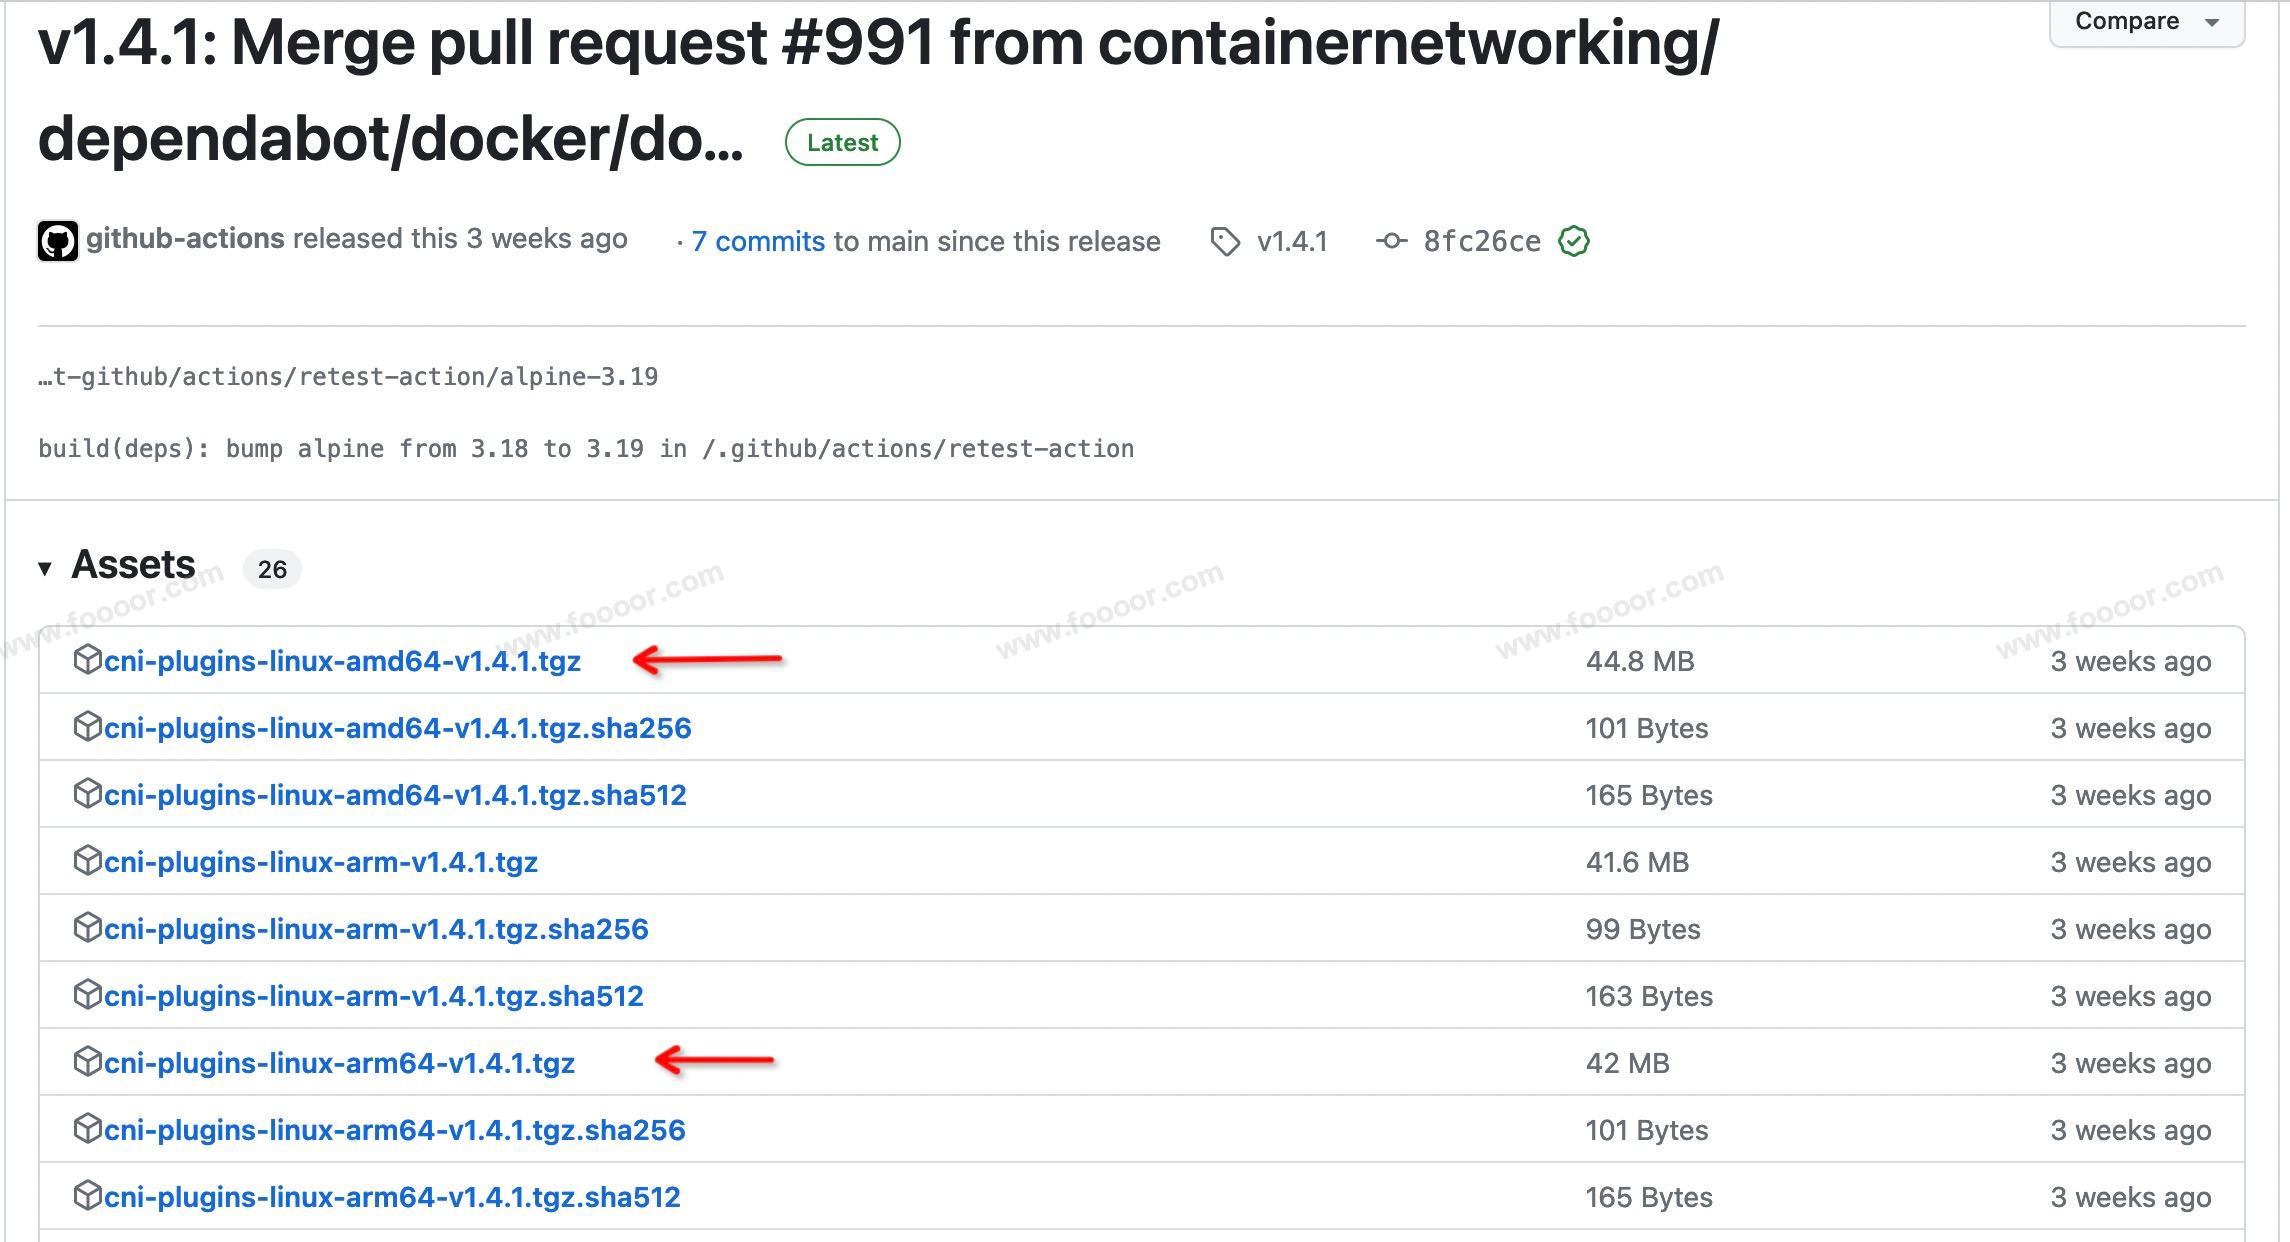
在 containerd 所在主机上进行下载,解压等操作:
shell
# 下载插件压缩包,选择适合自己主机的架构
wget https://github.com/containernetworking/plugins/releases/download/v1.4.1/cni-plugins-linux-arm64-v1.4.1.tgz

# 创建一个目录,待会把插件压缩包解压到这个目录
mkdir cni-plugins

# 解压插件压缩包
tar -zxvf cni-plugins-linux-arm64-v1.4.1.tgz -C cni-plugins

# 查看解压后的内容
ls cni-plugins
bandwidth  dhcp   firewall     host-local  LICENSE   macvlan  ptp        sbr     tap     vlan
bridge     dummy  host-device  ipvlan      loopback  portmap  README.md  static  tuning  vrf
3 准备CNI网络配置文件
准备容器网络的配置文件,用于配置容器的网关、IP地址等。
创建 /etc/cni/net.d/10-mynet.conf 文件,在其中创建一个名称为 mynet 的网络,其中指定网桥的名称为 cni0。
vim /etc/cni/net.d/10-mynet.conf :
json
{
  "cniVersion": "1.0.0",
  "name": "mynet",
  "type": "bridge",
  "bridge": "cni0",
  "isGateway": true,
  "ipMasq": true,
  "ipam": {
    "type": "host-local",
    "subnet": "10.66.0.0/16",
    "routes": [
      { "dst": "0.0.0.0/0"}
    ]
  }
}
4 生成CNI网络
进入到刚才解压的 cni 目录,目录下有一个 scripts 目录,进入到该目录执行如下命令:
shell
CNI_PATH=/home/doubi/cni-plugins ./priv-net-run.sh echo "Hello"上面的命令其实就是执行 ./priv-net-run.sh 这个脚本,只是在执行前需要知道 cni-plugins 的路径,所以在前面指定了 cni-plugins 的路径,后面的 echo "Hello" 只是打印了一条语句,执行的时候,如果打印出来,表示执行成功了。
执行的时候会报错,找不到 jq:
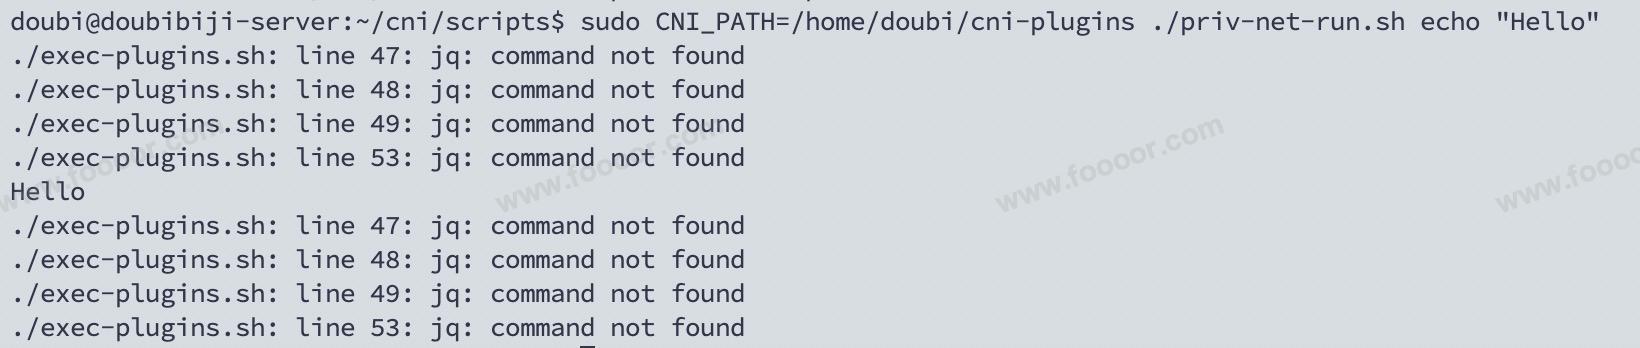
需要安装 jq :
shell
# CentOS 中,先添加阿里云的epel源
wget -O /etc/yum.repos.d/epel.repo https://mirrors.aliyun.com/repo/epel-7.repo
# 然后安装
sudo yum install jq

# Ubuntu
sudo apt install jq
安装完成,继续执行 ./priv-net-run.sh 这个脚本,没有问题,会安装成功。
安装成功后,使用 ifconfig,会发现 containerd 的主机上会多了一个 cni0 的网络接口。
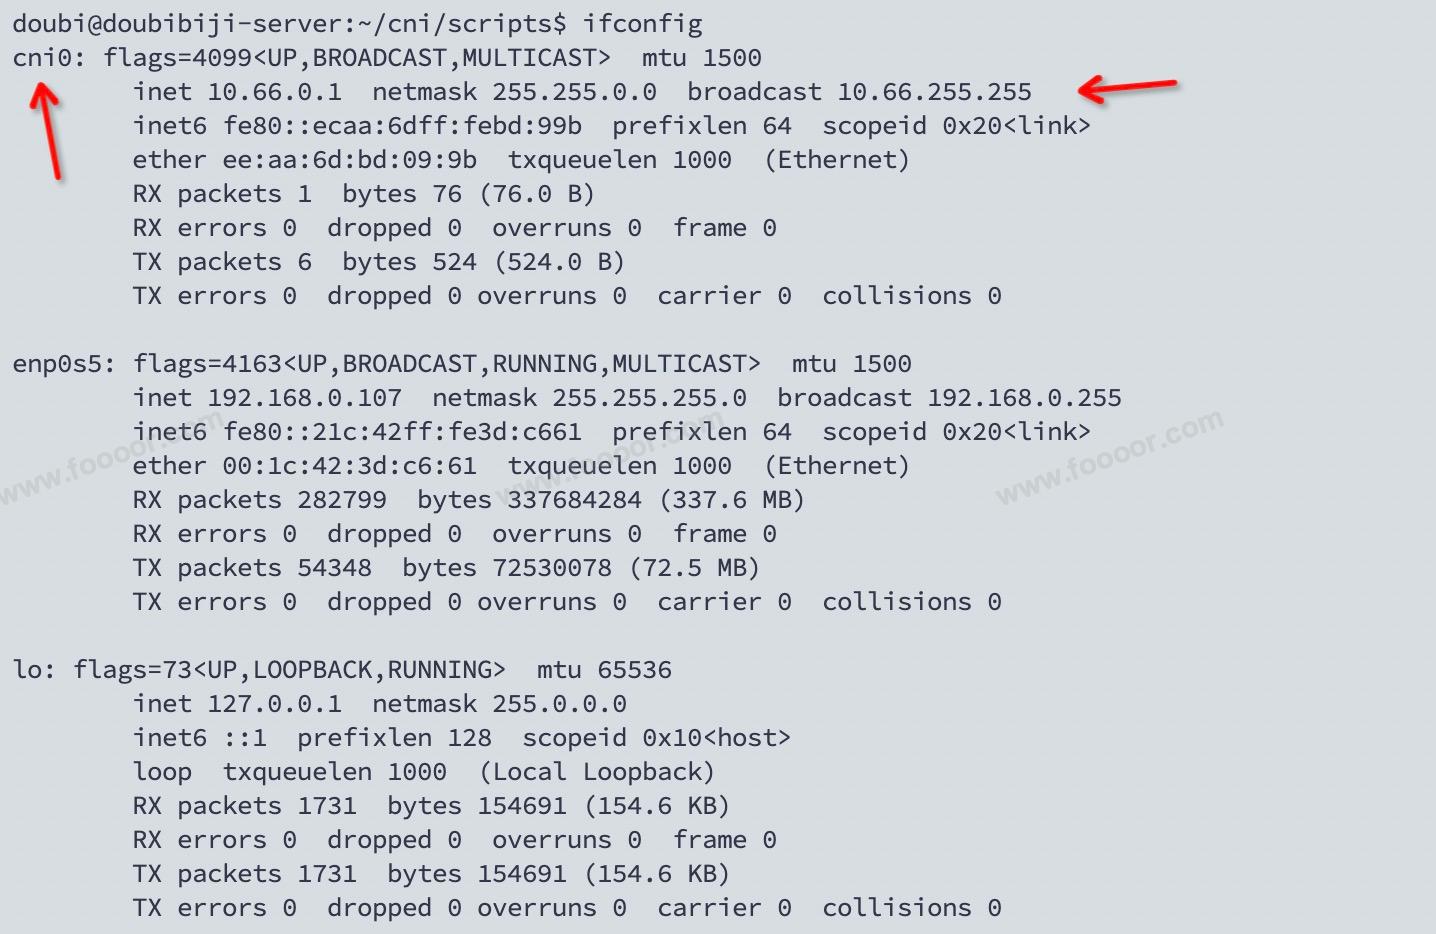
这个 cni0 网络就是容器与外部进行通信的网桥,所有的容器都可以连接到这个网络。
7.2 容器配置网络功能
刚才已经在 containerd 的主机上,也就是宿主机上配置了网络接口 cni0 ,下面需要配置容器,使用这个网络进行通信。
1 创建容器
这里我们使用 busybox 这个镜像来创建工具,因为 busybox 镜像中包含了很多工具,方面我们查看网络情况。
首先下载镜像:
shell
ctr images pull docker.io/library/busybox:latest然后运行容器:
shell
ctr run -d docker.io/library/busybox:latest my-busybox运行完成,可以查看到容器和任务:
shell
root@doubibiji-server:~# ctr c ls		# 查看容器
CONTAINER     IMAGE                               RUNTIME
my-busybox    docker.io/library/busybox:latest    io.containerd.runc.v2

root@doubibiji-server:~# ctr task ls		# 查看任务
TASK          PID     STATUS
my-busybox    8938    RUNNING
2 进入容器查看网络
现在进入容器查看一下容器现在的网络情况。
进入容器:
shell
ctr task exec --exec-id $RANDOM -t my-busybox /bin/sh查看网络情况,发现只有一个回环链路,而且 ping 宿主机的 IP 也 ping 不通:
shell
root@doubibiji-server:~# ctr task exec --exec-id $RANDOM -t my-busybox /bin/sh
/ # ifconfig
lo        Link encap:Local Loopback
          inet addr:127.0.0.1  Mask:255.0.0.0
          inet6 addr: ::1/128 Scope:Host
          UP LOOPBACK RUNNING  MTU:65536  Metric:1
          RX packets:0 errors:0 dropped:0 overruns:0 frame:0
          TX packets:0 errors:0 dropped:0 overruns:0 carrier:0
          collisions:0 txqueuelen:1000
          RX bytes:0 (0.0 B)  TX bytes:0 (0.0 B)

/ # ping 192.168.0.107		# ping 宿主机IP
PING 192.168.0.107 (192.168.0.107): 56 data bytes
ping: sendto: Network is unreachable
/ #
可以看到现在容器内部只有回环网络,ping 宿主机都不通。
3 为容器添加网络
下面为指定的容器添加网络。
首先需要获取到容器的 PID,使用 ctr task ls 可以看到 :
shell
pid=$(ctr task ls | grep my-busybox | awk '{print $2}')
echo $pid
上面的命令主要是获取 PID 的值。
然后在宿主机中获取指定容器的网络命名空间路径:
下面的命令是在上面的命令执行完成后执行的,因为下面用到了上面的变量 $pid :
shell
netnspath=/proc/$pid/ns/net
echo $netnspath
得到了容器的 PID 和 网络命名空间路径,下面就可以为容器添加网络了,还是进入到之前 cni 目录下的 scripts 脚本下执行:
shell
CNI_PATH=/home/doubi/cni-plugins ./exec-plugins.sh add $pid $netnspath执行完成,重新进入容器,查看容器的网卡信息:
shell
root@doubibiji-server:~# ctr task exec --exec-id $RANDOM -t my-busybox /bin/sh
/ # ifconfig
eth0      Link encap:Ethernet  HWaddr 46:ED:8B:6B:58:AF
          inet addr:10.66.0.3  Bcast:10.66.255.255  Mask:255.255.0.0
          inet6 addr: fe80::44ed:8bff:fe6b:58af/64 Scope:Link
          UP BROADCAST RUNNING MULTICAST  MTU:1500  Metric:1
          RX packets:7 errors:0 dropped:0 overruns:0 frame:0
          TX packets:9 errors:0 dropped:0 overruns:0 carrier:0
          collisions:0 txqueuelen:0
          RX bytes:666 (666.0 B)  TX bytes:682 (682.0 B)

lo        Link encap:Local Loopback
          inet addr:127.0.0.1  Mask:255.0.0.0
          inet6 addr: ::1/128 Scope:Host
          UP LOOPBACK RUNNING  MTU:65536  Metric:1
          RX packets:0 errors:0 dropped:0 overruns:0 frame:0
          TX packets:0 errors:0 dropped:0 overruns:0 carrier:0
          collisions:0 txqueuelen:1000
          RX bytes:0 (0.0 B)  TX bytes:0 (0.0 B)

/ # ping 192.168.0.107		# ping 宿主机IP
PING 192.168.0.107 (192.168.0.107): 56 data bytes
64 bytes from 192.168.0.107: seq=0 ttl=64 time=7.863 ms
64 bytes from 192.168.0.107: seq=1 ttl=64 time=0.140 ms
可以看到多了一个 eth0 网卡信息,此时 ping 宿主机也是可以通的。
同样,在宿主机可以 ping 10.66.0.3 来 ping 容器。