Appearance
SpringBoot3教程 - 7 SpringBoot集成Redis
下面介绍一下在 SpringBoot 项目中集成 Redis,体会一下 SpringBoot 集成第三方组件的便捷。
7.1 集成Redis
1 创建SpringBoot项目
创建项目,不多说了。
另外准备好 Redis 待会用来连接。
2 添加依赖
在项目的 pom.xml 文件中添加 Redis 相关的依赖:
xml
<!-- 集成redis -->
<dependency>
  <groupId>org.springframework.boot</groupId>
  <artifactId>spring-boot-starter-data-redis</artifactId>
</dependency>

<!-- redis需要用到的连接池 -->
<dependency>
  <groupId>org.apache.commons</groupId>
  <artifactId>commons-pool2</artifactId>
</dependency>
3 配置application.yml
在 application.yaml 中添加Redis连接信息的配置和连接池的配置:
yaml
spring:
  data:
    redis:  # redis配置
      host: localhost
      port: 6379
      password: 123456
      database: 0  # 指定使用哪个数据库
      lettuce:
        pool:  # 连接池配置
          # 最大连接数
          max-active: 10
          # 最大阻塞等待时间
          max-wait: 3000
          # 最大空闲连接
          max-idle: 5
          # 最小空闲连接
          min-idle: 2
          enabled: true
注意,上面 redis 是配置了密码,所以 redis 要配置需要密码 requirepass 密码,否则会报错:
ERR AUTH <password> called without any password configured for the default userspring-boot-starter-data-redis默认的Redis客户端是Lettuce,Lettuce是基于 Netty,实现了完全异步、非阻塞的 Redis 客户端。
4 编写测试类和接口
下面编写一下测试类,通过接口访问,调用接口添加数据到Redis中,这是模拟测试一下,数据是写死在代码里的。
1 Service
DoubiCacheServiceImpl.java
java
package com.doubibiji.hellospringboot.service.impl;

import com.doubibiji.hellospringboot.service.IDoubiCacheService;
import lombok.extern.slf4j.Slf4j;
import org.springframework.beans.factory.annotation.Autowired;
import org.springframework.data.redis.core.StringRedisTemplate;
import org.springframework.stereotype.Service;

@Slf4j
@Service
public class DoubiCacheServiceImpl implements IDoubiCacheService {

    // 直接注入StringRedisTemplate进行使用
    @Autowired
    private StringRedisTemplate redisTemplate;

    /**
     * 缓存数据
     */
    public void setValue() {
        // 保存字符串
        redisTemplate.opsForValue().set("key_str", "www.doubibiji.com");

        // 保存map元素
        // redisTemplate.opsForHash().put("key_map", "key_1", "doubi");
        // redisTemplate.opsForHash().put("key_map", "key_2", "niubi");
    }

    /**
     * 获取缓存数据
     */
    public String getValue() {
        // 获取数据
        String value = redisTemplate.opsForValue().get("key_str");
        log.info("value: " + value);

        // 获取map中的一个元素
        // String value1 = redisTemplate.<String, String>opsForHash().get("key_map", "key_1");

        // 获取map中的所有元素
        // Map<String, String> map = redisTemplate.<String, String>opsForHash().entries("key_map");

        return value;
    }
}
IDoubiCacheService.java 接口
java
package com.doubibiji.hellospringboot.service;

public interface IDoubiCacheService {
    /**
     * 缓存数据
     */
    void setValue();

    /**
     * 缓存数据
     */
    String getValue();
}
2 Controller
添加接口,待会通过浏览器访问
java
package com.doubibiji.hellospringboot.controller;

import com.doubibiji.hellospringboot.service.IDoubiCacheService;
import lombok.extern.slf4j.Slf4j;
import org.springframework.beans.factory.annotation.Autowired;
import org.springframework.web.bind.annotation.GetMapping;
import org.springframework.web.bind.annotation.RequestMapping;
import org.springframework.web.bind.annotation.RestController;

@Slf4j
@RestController
@RequestMapping("/redis")
public class TestRedisController {

    @Autowired
    private IDoubiCacheService doubiCacheService;

    @GetMapping("/setValue")
    public String cacheValue() {
        doubiCacheService.setValue();
        return "ok";
    }

    @GetMapping("/getValue")
    public String getValue() {
        String value = doubiCacheService.getValue();
        return value;
    }
}
5 访问测试
通过浏览器访问 http://localhost:8080/redis/setValue 接口将数据缓存到 redis 中。
然后通过 http://localhost:8080/redis/getValue 可以获取到缓存中的数据了。

集成完成,是不是非常的迅速简单。
7.2 RedisTemplate
上面用的是 StringRedisTemplate 来保存数据,使用 StringRedisTemplate 存储数据到Redis中,key 和 value 都是 String 类型的,当然可以存储 Set 和 Map 类型的数据,但是key 和 value 也都是 String 类型。如果你想存储对象类型到 Redis 中,需要手动将数据序列化,例如转换为 json 字符串,然后保存到Redis中。
如果你想直接将对象保存到Redis中,然后从Redis中取出的数据就是一个对象,那么你可以使用 RedisTemplate,它会自动帮你进行序列化和反序列化。
两者的一些区别:
- RedisTemplate使用的是 JdkSerializationRedisSerializer 序列化对象;StringRedisTemplate使用的是 StringRedisSerializer 序列化String;
- StringRedisTemplate存储数据,因为都是字符串,可见性强,易于维护;RedisTemplate使用二进制数组方式存储,内容没有可见性。
因为StringRedisTemplate 也是继承自 RedisTemplate 的,只是修改了序列化的方式,所以他们的 API 是一样的。
下面演示一下RedisTemplate 的使用。
1 创建实体类
创建一个实体类,User.java,待会将这个实体类存储到 Redis 中:
java
package com.doubibiji.hellospringboot.domain;

import lombok.AllArgsConstructor;
import lombok.Data;
import lombok.NoArgsConstructor;

import java.io.Serializable;

@Data
@AllArgsConstructor
@NoArgsConstructor
public class User implements Serializable {  # 需要实现Serializable接口

    private String username;
    private Integer age;

}
2 保存与获取
可以直接将对象保存到Redis,自动序列化。
java
package com.doubibiji.hellospringboot.service.impl;

import com.doubibiji.hellospringboot.domain.User;
import com.doubibiji.hellospringboot.service.IDoubiCacheService;
import lombok.extern.slf4j.Slf4j;
import org.springframework.beans.factory.annotation.Autowired;
import org.springframework.data.redis.core.RedisTemplate;
import org.springframework.stereotype.Service;

@Slf4j
@Service
public class DoubiCacheServiceImpl implements IDoubiCacheService {

    // 直接注入RedisTemplate进行使用
    @Autowired
    private RedisTemplate redisTemplate;

    /**
     * 缓存数据
     */
    public void setValue() {
        User user = new User("doubi", 18);
        // 保存字符串
        redisTemplate.opsForValue().set("key_user", user);
    }

    /**
     * 获取缓存数据
     */
    public String getValue() {
        // 获取数据
        User user = (User) redisTemplate.opsForValue().get("key_user");
        log.info("value: " + user);

        return user.toString();
    }
}
使用工具查看Redis中的数据如下:
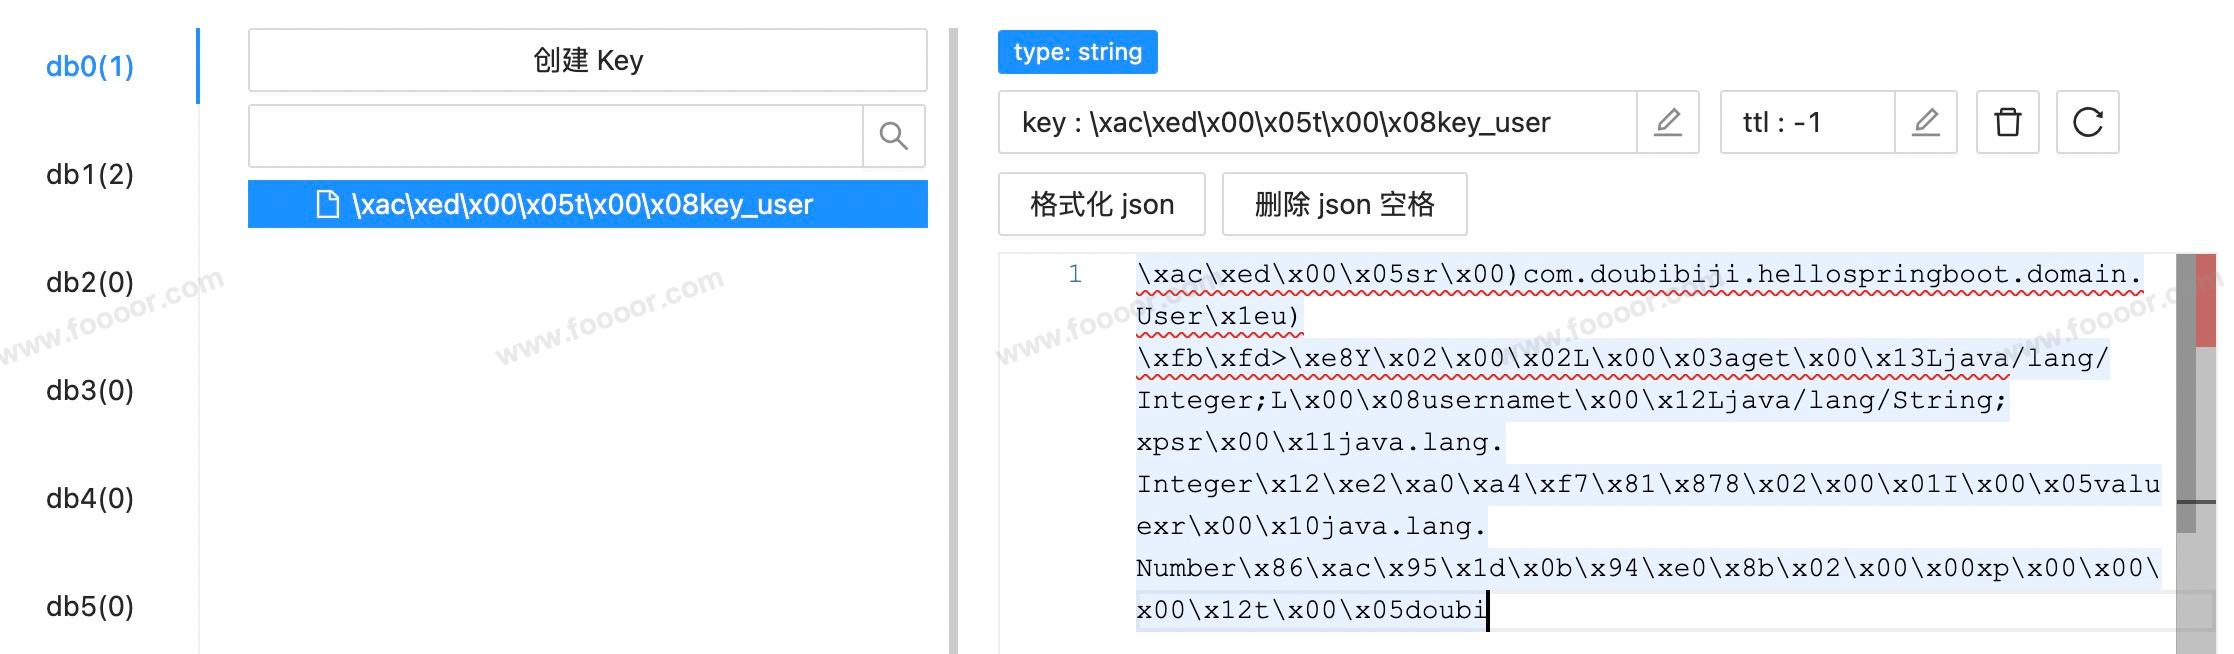
可以看到 key 和 value 都是二进制数据,无法可视化。
3 指定序列化器
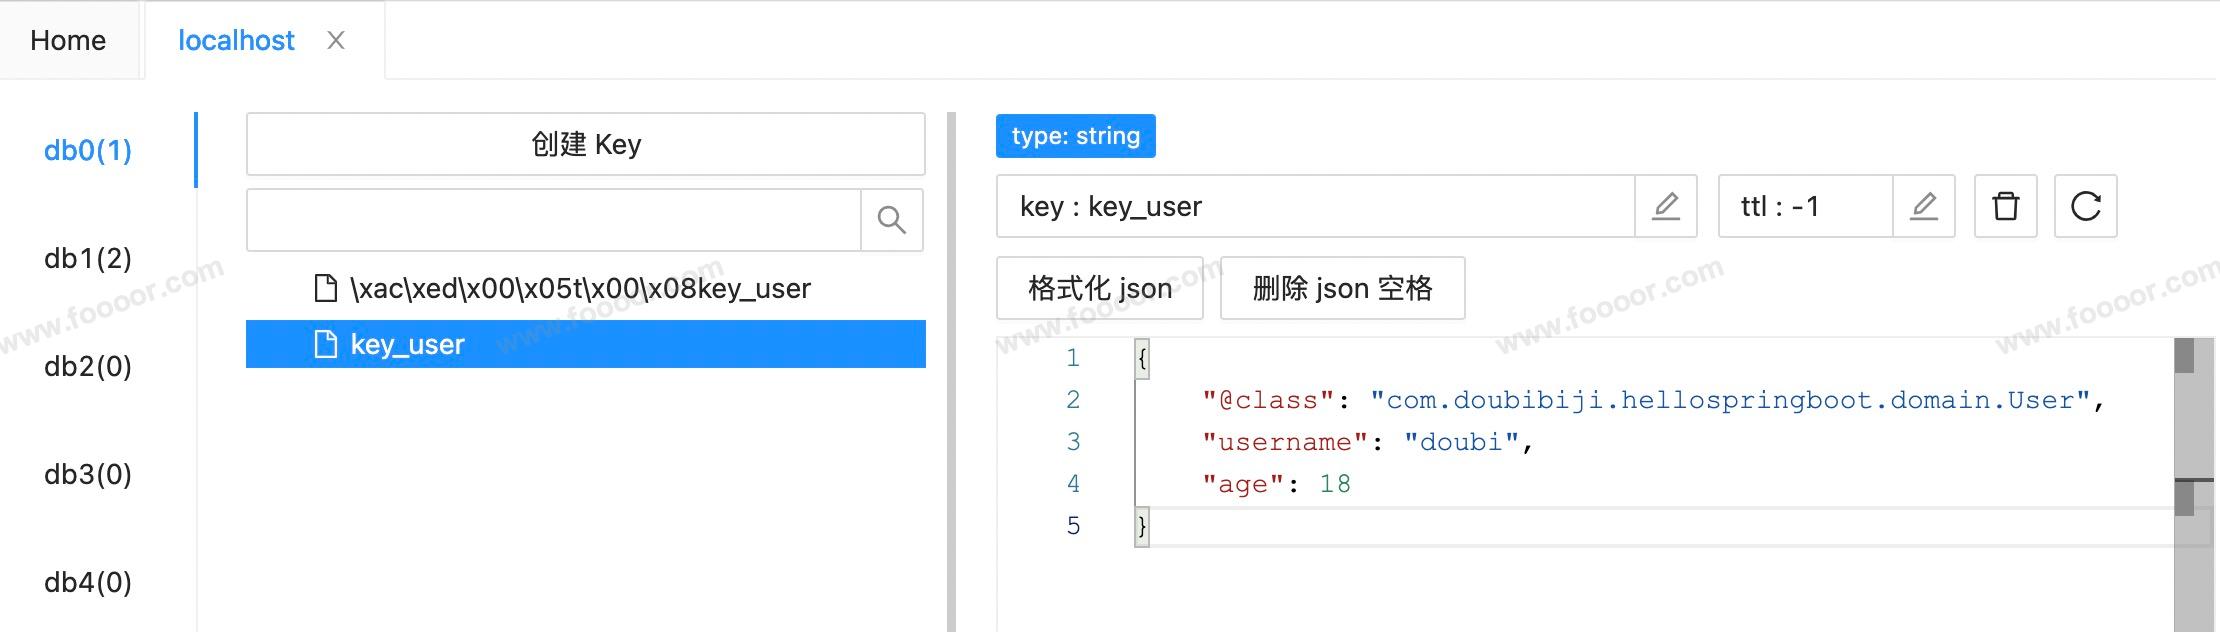
当然我们也可以配置 RedisTemplate 的序列化器,指定其序列化方式。例如可以让其使用JSON格式进行序列化。
首先创建一个配置类,添加 @Configuration 注解,在类中,创建一个 RedisTemplate Bean对象。指定 RedisTemplate 使用的序列化器。
java
package com.doubibiji.hellospringboot.config;

import org.springframework.context.annotation.Bean;
import org.springframework.context.annotation.Configuration;
import org.springframework.data.redis.connection.lettuce.LettuceConnectionFactory;
import org.springframework.data.redis.core.RedisTemplate;
import org.springframework.data.redis.serializer.GenericJackson2JsonRedisSerializer;
import org.springframework.data.redis.serializer.StringRedisSerializer;

@Configuration
public class RedisConfig {

    /**
     * 配置Redis序列化
     */
    @Bean
    public RedisTemplate<String,Object> redisTemplate(LettuceConnectionFactory lettuceConnectionFactory){
        RedisTemplate<String, Object> redisTemplate = new RedisTemplate<>();
        redisTemplate.setConnectionFactory(lettuceConnectionFactory);
        //设置key序列化方式String
        redisTemplate.setKeySerializer(new StringRedisSerializer());
        //设置value的序列化方式json,使用GenericJackson2JsonRedisSerializer替换默认的序列化
        redisTemplate.setValueSerializer(new GenericJackson2JsonRedisSerializer());
        redisTemplate.setHashKeySerializer(new StringRedisSerializer());
        redisTemplate.setHashValueSerializer(new GenericJackson2JsonRedisSerializer());
        redisTemplate.afterPropertiesSet();
        return redisTemplate;
    }
}
再次运行项目,调用接口,执行 Service 中代码,然后时候客户端工具查看Redis中的数据,可以看到是 JSON 格式的: